
This post contains affiliate links. If you buy something through these links, I may earn a small commission at no extra cost to you. I only recommend gear I’ve actually used out on the trails and really loved! Read my full disclaimer.
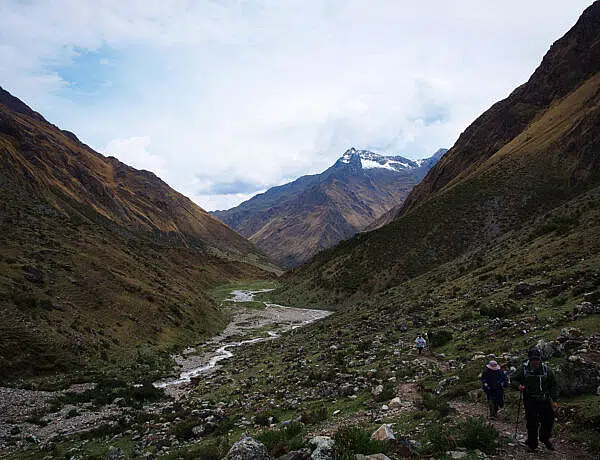
New Zealand is simply made for multi-day hiking, and the Routeburn Track in the Southern Alps is one stunning example.
It holds a special place in my heart as the first multi-day hike we ever did in New Zealand. I was also still dealing with acute anxiety and trying not to constantly have a panic attack so I think of being able to complete this hike as a big ‘accomplishment’. 🙂
The Routeburn Track takes you into the sub-alpine terrain of New Zealand’s Southern Alps across Mount Aspiring National Park and Fiordland National Park.

Being at sub-alpine levels is beyond magnificent.
It’s not only the fresh air or lofty mountain peaks you tend to see but you seem to be ‘put in your place’. You realise how much bigger and more majestic the world is, and how small you really are. I find it a humbling experience that brings me ‘back to earth’.
[NOTE: Like the Milford Track, you can hike the Routeburn Track as a guided walk with individual rooms, showers and cooked meals. Unless it’s your only chance to hike the Routeburn or you don’t really have any hiking gear, it’s fairly easy to organise your own Routeburn hike as it’s so short and well-marked.]
This is a fairly long post so perhaps get a cup of tea first.
HIKING THE ROUTEBURN TRACK: THE BASICS
The Routeburn Track is one of 11 Great Walks in New Zealand, all offering spectacular scenery and in most cases fantastic hut facilities.
It’s also one of three Great Walks within relative vicinity of New Zealand’s self-styled adventure capital, Queenstown (it really is a bit of a crazy adventure and party town). The other two hikes being the Kepler Track and the Milford Track but both are much closer to Te Anau.
As one of the shorter Great Walks at only 33km, it’s a good choice for anyone who hasn’t done much multi-day hiking, is recovering from an injury or simply not as hiking-fit as they might like (that’s me).

Since you can hike the Routeburn from either trailhead, it intersects with another multi-day trail (Greenstone-Caples Tracks), you can stay in huts as well as camp, and there are options for day hikes, the Routeburn Track ends up being a very busy trail, especially over the summer months.
Still, there are moments along the track where you feel like you’ve stepped right into Peter Jackson’s version of Middle Earth, and you might expect orcs or the Rohirrim popping out at any moment. Parts of it seem astonishingly familiar if you’ve seen the Lord of the Rings as countless times as I have.
Together with the breathtaking Milford Track, the Routeburn Track is right up there as one of the best walks we’ve ever done (though we’ve really enjoyed all our hikes in New Zealand so it’s a bit of a ridiculous thing to say).
THE ROUTEBURN TRACK AT A GLANCE

DISTANCE: 33.1KM
TIME: 2-4 days
GRADE: intermediate
START POINT: Routeburn Shelter
END POINT: The Divide Shelter
PERMITS: Department of Conservation
FEES: $25-$120 pp/pn (depending on season/country of residence)

PERSONAL ENJOYMENT RATING: 5/5
TRACK ROUTE AND HIKING OPTIONS
You can hike the Routeburn Track in either direction, whatever works best for you.
Starting off in beech forest from Routeburn Shelter, the track climbs above the treeline, meanders along a ridge with sprawling views of mountain peaks, before dropping down to picturesque Lake Mackenzie. From there you’re onto Lake Howden and Key Summit if you want a side trip before finishing at The Divide Shelter.
Of course, you can do the whole thing in reverse and start at The Divide.
Along the way are so many mountain streams, swing bridges, cascades and waterfalls, and such extraordinary views that hiking this track might slow you much more than anticipated.

Instead of staying in the very popular huts, you could also camp along the trail. This would make the whole hike a lot cheaper. If you’re camping, you can’t use the hut facilities so you’ll have to bring your cooking gear (including a stove, etc.).
There’s no camping at Routeburn Falls Hut (only at the other two) so you’d have to divvy up your days differently if you wanted to camp.
Most people probably hike the Routeburn Track in three days, staying at the ridiculously scenic Routeburn Falls Hut and then Lake Mackenzie Hut. There’s also the option to stay at Routeburn Flats Hut to start with.
Some people also stay two nights at one of the huts and hike out the same way they came to avoid the transport issues. One of your days would then be a day hike to however far you can walk and return to the same hut for a second night (e.g. Routeburn Falls, then Lake Mackenzie for two nights, then back to Routeburn Falls).
Transport-wise, you’ll require a private car shuffle, vehicle relocation or bus transfer to get you back to Queenstown, Te Anau or wherever you want to go if you’re hiking from one trailhead to the other. Keep in mind that while the hike is only 33km, the driving distance between the two trailheads is a 320km trip (4-5 hours).
TOILET ACCESS
Like on other Great Walks, toilet access is very good on the Routeburn Track.
Not only are there toilets at each hut and shelter (including at the start/end) but there are also a couple of toilets along the trail, e.g. between Routeburn Shelter and Routeburn Flats Hut, after the Orchard and near the Key Summit turnoff.

All the toilets were well-stocked with toilet paper but I always carry some spare in case there’s none left.
ELEVATION PROFILE
The Routeburn Track is fairly straightforward in terms of elevation. You climb up to a saddle and you’ll come down again.
From Routeburn Shelter, you start in the forest at around 500m and spend Day 1 and the first part of Day 2 climbing up to the highest point on the trail at Harris Saddle (1,255m).
For the rest of Day 2, the track traverses a sub-alpine ridgeline and then drops down to Lake Mackenzie at 889m. Day 3 continues the downhill minus a last little climb towards the end and finishes at The Divide Shelter and back to 532m.

The uphill sections are not difficult per se, they’re just steadily ascending. You do get incredible views into the Routeburn Valley and the Humboldt Mountains along the way.
The side trips add an extra bit of elevation: Conical Hill (1,515m) on Day 2 and Key Summit (919m) on Day 3.
None of the days seemed particularly hard (though I got pretty warm and puffy on the steady uphills) but the last day seemed like it would never end, especially once we’d taken the side trip to Key Summit. It might have also been because it was a fairly warm day and the track was busy with a steady stream of day hikers.
BEST TIME TO HIKE THE ROUTEBURN TRACK
The Routeburn Track directly intersects with over 32 avalanche paths and winter hiking is only recommended for very experienced hikers who have training and equipment to deal with snow conditions in avalanche terrain.

Just like the Kepler Track or the Milford Track, the Routeburn is best hiked during the Great Walks season (early/mid-November to end of April). The huts will be operating at full capacity, bridges will be in place and any track damages are usually dealt with as quickly as possible.
At the beginning of the Great Walks season, there’s often still snow on the track. In fact, at sub-alpine level it can snow at any time even over the summer months.
We hiked the Routeburn Track in the middle of autumn (mid-April) and it was decidedly fresh in the mornings and evenings.

Except for inclement weather on our first day, we had brilliant conditions: sunny and blue skies. We didn’t see snow but our second night was on the very frosty side (around 0°C), and we woke up to frost-covered leaves all around Lake Mackenzie.
TIPS FOR HIKING THE ROUTEBURN TRACK
Here are a few things to keep in mind when planning your hike:
GETTING A PERMIT
The Routeburn Track isn’t quite as insanely popular as the Milford Track but it’s not far off. The capacity is slightly larger, not least because you can also camp along it.
That said, securing a hut booking is usually the hardest part of any planning.
Check the dates for when the DOC booking system opens (usually May/June each year) and then be ready to book on the dot. You might just end up with whatever is available and plan the rest of your trip around any booking you managed to get (at least that’s what we do).
If you’re happy to camp, you might have more of a chance to snatch up a spot. Camping fees for international hikers during the season are NZ$38 per night.
If you’ve missed out, keep checking the booking system as people do cancel and you might be lucky and benefit from someone else’s cancellation. That’s how we ended up on our Routeburn adventure.
Fees vary depending on the season and whether you’re considered residing in New Zealand or not. For the 24/25 summer season, the hut fee for international hikers is NZ$120 per night.
Check all fees and booking options. For more information, check the Department of Conservation (DOC) Routeburn Track website.
GETTING TO/FROM THE ROUTEBURN TRACK
As mentioned, the Routeburn Track is relatively close to Queenstown.
You can easily organise a bus transfer to either trailhead. It’s much easier to start at Routeburn Shelter (70km from Queenstown) though and finish at The Divide Shelter (250km from Queenstown) as your long bus trip will be at the end when you’re stuffed anyway.
If starting at The Divide, you might want to stay in Te Anau pre-hike and get an earlier bus in the morning then.
The drive from Queenstown to Glenorchy (on the way to Routeburn Shelter) is a stunning scenic drive. When we did the Routeburn, we went in the early morning and it was still very foggy and drizzly but already looked magnificent.

We’ve since done it again, and it really is a gorgeous drive.
If you have your own vehicle and want it relocated to the other trailhead, Trackhopper are a great option. We’ve used them twice so far and have had no issues whatsoever.
HUTS AND ACCOMMODATION
During the Great Walks season, all huts are staffed by hut wardens who give nightly talks that include anything from weather for the next day, the next part of the track (and any detours you might need to take), reminders to clean up the bunk rooms before leaving, local fauna and flora, and conservation efforts.
They’re usually very informative and useful. A board somewhere around the hut will tell you what time the nightly talk is.
The facilities in the huts on the Routeburn Track are fantastic (during the season):
- Cooking facilities (gas stoves) are provided in all huts but bring your own pot, bowl/cutlery, cooking utensils and obviously food.
- There’s cleaning liquid in all huts, which can double as dishwashing liquid. We generally find that the huts have cleaning cloths but we always bring our own to avoid any food contamination and because sometimes they can be a little on the unsavoury side.
- Flush toilets and cold water sinks in the (usually communal) bathrooms.
- Filtered water is available.
- Sleeping mats are provided. Only the mats at Routeburn Falls Hut were the newer thick blue ones. Lake Mackenzie Hut still had the old grey mats.
- Routeburn Falls and Lake Mackenzie both have solar-powered lighting, fireplaces that are lit by the rangers and drying racks. I expect it’s the same at Routeburn Flats Hut.

In the off-season, hut facilities are greatly reduced, including no gas, no mats, drop toilet only and no water inside the huts. You also can’t book a bunk, they’re all ‘first come, first served’ (you need a backcountry pass then).
QUEENSTOWN ACCOMMODATION
If you want to stay in Queenstown before or after your hike, there is quite a lot of accommodation but Queenstown is notoriously expensive so booking ahead does pay.
In the past, we’ve stayed close to the airport in Queenstown at the Quest Apartments in the Remarkables area (quiet, close the shops and within walking distance to the airport, which is what we needed that time).
We’ve also had a last-minute stay at the Whistler Holiday Apartments (a bit of road noise, especially on the balcony but the location is hard to beat) in Queenstown, and have stayed at the Creeksyde Holiday Park when we’ve travelled in a campervan (a bit quirky but great proximity to the centre of town).
HOW WE ORGANISED OUR ROUTEBURN TRACK HIKE
We hiked the Routeburn Track as part of a 3-week road trip around the South Island.
We stayed at the Twelve Mile Delta DOC campsite the night before the hike and drove to the trailhead in the morning. Twelve Mile Delta is not that amazing a camping area but it was convenient and relatively cheap.

Here’s how we organised our Routeburn Track hike:
- Hiked over 3 days, Routeburn Shelter to The Divide (east to west)
- Booked to stay at Routeburn Falls Hut and Lake Mackenzie Hut
- Drove our campervan to the car park at Routeburn Shelter on the morning of Day 1
- Organised van relocation to The Divide Shelter with Trackhopper
- Three days later, picked up our campervan at The Divide car park and went off to explore Milford Sound
COSTS
Being a shorter hike, the Routeburn Track is straightaway more affordable than say the Milford Track or the Kepler Track.
If you have your own vehicle, your biggest cost is likely going to be the car relocation (minimum NZ$300) though you could also hike back to your starting point to avoid that cost.
A bus transfer will also not be cheap and depending on whether you need a round trip, will cost you around NZ$150-$160 per person.
The best way to lower the cost of hiking the Routeburn Track is by camping. As an international (i.e. non-Kiwi) hiker, the cost will be as low as NZ$84 (2026) for two nights.
We spent:
- Routeburn Track DOC hut permits: NZ$130 pp/pn (international visitor) (2026: NZ$132)
- Campervan relocation: NZ$320 (2026: NZ$355 + fuel)
- Total: NZ$840 (~AU$750) (2 people)
Added to that would be the three days of rental costs for the campervan hire while we were hiking, and any food we bought pre-hike.
USEFUL GEAR TO PACK FOR THE ROUTEBURN TRACK
Being a shorter hike and staying in huts, your pack is so much lighter (or at least mine gets lighter since I usually carry a lot of the food). Here’s some gear that worked for us on our Routeburn hike:
Routeburn Track gear guide
🗺️ Map: You don’t really need one beyond the DOC map you get at check-in in Queenstown; all Great Walks are very well-signposted, you can’t really get lost.
🌧️ Rain Gear: A must-have. These days I use the Patagonia TorrentShell 3L rain jacket. We also brought rain pants but didn’t end up wearing them.
🎒 Dry Bags: Essential for keeping your gear dry and organised. My sleeping bag travels in a Sea to Summit compression dry bag to squish it down and save space. I prefer quality dry bags over the giant, unwieldy yellow DOC pack liners.
🧦 Merino Socks: I’ve been hiking in Icebreaker merino socks for years. I wore ‘hike+ medium’ during the day and thinner ‘hike+ light’ in the evenings.
🦯 Hiking Poles: Very useful for the uphills. I used my foldable Black Diamond carbon trekking poles to get me up those hills; the husband finds them more useful for the descents to save his knees.
🍳 Cooking Gear: We love our older one-pot version of this compact Sea to Summit Cooking Set. One pot, two cups, and two bowls all nestle together perfectly. I can even fit in the lighter and cleaning cloth.
💧 Hydration: I use an Osprey water bladder these days but we just carried 1L bottles, there are so many fast-flowing water streams coming down the mountains that we had no trouble filling up. We also had a 750ml insulated thermos that I filled with hot fruit tea in the mornings and had at lunch. Fantastic when the winds at Harris Saddle were icy!
🩹 Hygiene: I prefer to use natural hand sanitiser and love Koala Eco hand sanitiser. I also carry a Kula cloth and extra toilet paper just in case (on the Routeburn toilets were well-stocked with toilet paper though).
🩹 Blister Care: I always have Compeed blister patches in my first-aid kit for “just-in-case” situations. They can sometimes stick to woollen socks, but they work amazingly!
🍃 Leave No Trace: It’s pack-in, pack-out on the Routeburn. I use a large ziplock bag stuffed into an Exped Drysack UL to keep everything contained (I’ve had ziplock bags rip, not pretty). Follow leave no trace principles to keep things beautiful.
Note: This list contains affiliate links. If you buy through them, I may earn a small commission at no extra cost to you. I only recommend gear I’ve actually used out on the trails and really love!
HIKING THE ROUTEBURN TRACK: ITINERARY AND TRIP REPORT
As mentioned, we hiked the Routeburn Track in mid-April while we were on a 3-week campervan trip around the South Island a few years back.
Torrential rain the day before had left us with low clouds and drizzly weather on our first day but we ended our adventure on a sunny, almost too warm day.
Since we were hiking east to west, our itinerary started at Routeburn Shelter and finished at The Divide. If you’re hiking west to east, just reverse everything.
DAY 1: ROUTEBURN SHELTER – ROUTEBURN FALLS HUT | 9.8KM
Even though we’d got up early and left our campsite at Twelve Mile Delta just after 7am, we didn’t start hiking until almost 11am. It seemed to take us ages to pack our gear and get going.
The good thing was that by then the rain had mostly stopped and we could hike without our rain gear on.
Up to Routeburn Flats Hut, the track is a gentle ascent, after which you get to enjoy a more steady uphill that had me huffing and puffing for long moments.
But the Routeburn Track is so incredible that you don’t mind stopping here and there to catch your breath. I was fairly nervous and anxious about this first multi-day hike in New Zealand but hiking through spectacular scenery definitely helped soothe my worried mind.

Past the bridge at Routeburn Shelter, the track is initially through lush beech forest and across a swing bridge over Sugarloaf Stream.
The track then climbs a bit to Bridal Veil Stream and another bridge.

Along the way, the track starts opening up here and there, and you’ll catch your first glimpses into Routeburn Gorge.
From here, it feels like you’re crossing one amazingly clear mountain stream after another all the while surrounded by ferns and vibrant beech forest. We just loved this part of the hike.

After the third swing bridge, the track soon forks off to Routeburn Flats. Even if you’re not staying here, the flats and the surrounding mountains are magnificent so don’t miss this.
It took us about two hours to get to Routeburn Flats (with plenty of photo stops) and by then it was well and truly lunch time.

We could barely tear ourselves away from this beautiful valley but after an hour we forced ourselves back on the track.

Just hiking out to Routeburn Flats would be a fantastic day hike (15km return), it’s such a stunning spot for lunch! We met a few day hikers who thought the same.

From Routeburn Flats it’s uphill all the way and somewhat steeper now as you increase your elevation by 260m over two kilometres.
There’s more swing bridges, cascading waterfalls down the rock face and the track narrows to single file.

The views along the way only get better and better, and I could hide all my huffing and puffing behind wanting to admire the, quite literally, breathtaking panoramas.

We arrived at Routeburn Falls Hut just before 3:30pm and were already among the last hikers. Luckily we could still get a bunk bed together.
ROUTEBURN FALLS HUT
Routeburn Falls Hut was the first DOC hut we’ve ever stayed at, and oh my gosh, is it in a stunning spot?! We were gobsmacked by its location, perched as it is on the edge of the treeline overlooking the Routeburn Valley.

Given the location of the hut, the ranger explained that everything gets helicoptered in/out here, including toilet waste! It must cost a fortune to build these huts.

Routeburn Falls Hut is a fairly busy hut, offering 48 bunk beds across two communal bunk rooms. You do get individual bunks here (rather than the sleeping platform style), which is always nice. There was not a spare bunk to be had that night.
The toilet facilities are at one end of the hut, so you don’t have to walk far, and the common room is at the other.


Half the hikers at the hut were very bedraggled as they had started from The Divide the day before and had to hike in torrential rain for a day to reach Lake Mackenzie Hut and still hadn’t quite dried off. The drying racks were thus rather full. But luckily we didn’t need them.
Still dealing with anxiety, the sheer bunch of people at the hut overwhelmed me and so we went for a walk up to stunning Routeburn Falls cascades. I spent almost an hour wandering around and taking photos (which I wouldn’t have had time for the next day).

By the time we got back for the nightly ranger talk, I felt much calmer.
DAY 2: ROUTEBURN FALLS HUT – LAKE MACKENZIE HUT | 11.3KM (WITH SIDE TRIPS: ~ KM)
Starting our typical pattern of late getaways on hut hikes, we only managed to leave Routeburn Falls Hut around 9am-ish.

On Day 2, the track initially climbs steeply alongside the Route Burn into a magnificent tussock-covered bowl with the Route Burn snaking its way through the flats.

We spent so much time admiring the views in front of us and turning around for the breathtaking Routeburn Valley and Humboldt Mountains behind us that it was taking forever to cross the flats and reach Lake Harris.

As you get closer to Lake Harris, the track narrows and sidles past bluffs providing impressive views of the lake.

From there things got really windy for us and somewhat icy, now being at an elevation of over 1,000m. I was starting to look forward to reaching the shelter at Harris Saddle. We got there just after 11am, much slower than anticipated but not surprising given all our photo stops.

Harris Saddle sits at the border of the two national parks, and from here on we would be hiking in Fiordland National Park (not that you could tell the difference).
After a very early lunch, we set off on the side trip for the day, the climb up Conical Hill.

Once we returned from Conical Hill, all we had left to do was pick up our packs, hike along the exposed ridge section and climb down to Lake Mackenzie at the end.


The views into the Hollyford Valley are fantastic though we were disappointed when we spotted signs of a road and what we mistook as a car park (now derelict Gunn’s Camp as we later learned). This being our first multi-day hike in New Zealand, we weren’t yet used to hiking within civilisation’s reach.

Along the ridge section are a multitude of crystal clear mountain streams coming down with plenty of opportunity to fill up our water bottles. The water was delicious!

It took us about two hours to reach the end of the traverse where Lake Mackenzie loomed large below us. From there it’s a steady zigzag down into the forest and onto Lake Mackenzie Hut.


By time we eventually got to the hut, I was pretty tired and my old niggling ITB friend had said a more than unwelcome hello. I was too tired to explore much around the hut and spent my time stretching my worn-out legs.
LAKE MACKENZIE HUT
Lake Mackenzie Hut is even bigger than Routeburn Falls Hut with 50 bunk beds in two bunk rooms but it didn’t feel as crowded since fewer hikers were staying here that night.
The hut is older than Routeburn Falls but luckily the vibe is more historic and charming than old and decrepit. 🙂


One bunk room is directly above the common room, making it nice and toasty from the fireplace below but also a much more popular and therefore noisier bedroom.
We chose the stand-alone bunk room a few metres away from the common room area, and got pretty good sleep. When we stayed, the mattresses were still the old grey ones but perhaps they’ve been replaced since. There were only eight of us in a bunk room that would have slept 32.

Being directly on Lake Mackenzie, the outlook is beautiful, and if it wasn’t mid-April and hovering around 5°C, the husband may have jumped in the lake for an icy bath.
We were warned that the infamous cheeky kea parrots liked to hang out at Lake Mackenzie Hut and not to leave anything outside that we didn’t want to say good-bye to. We did see one briefly but otherwise they remained a mythical creature on our hike.
SIDE TRIP: CONICAL HILL
The side trip to Conical Hill is about 1-2 hours extra hiking time.
It’s a very steep track but the views of Lake Harris and into the valley are worth it. If it’s a fine day, definitely do it.

On clear days, you can even spot the Tasman Sea in the far distance and get sprawling views into the Hollyford Valley.
You can leave your pack at Harris Saddle Shelter and just take a water bottle.
Without our packs, we hiked much faster and the whole side trip took us about an 1 hour 15 minutes with plenty of photo time (though high noon isn’t the best light but sometimes there’s nothing you can do about that…).
DAY 3: LAKE MACKENZIE HUT – THE DIVIDE | 12KM (WITH SIDE TRIP: ~ 18.8KM)
The morning of Day 3 was absolutely icy but that didn’t stop me from taking photos of the frosty vegetation around the lake until my fingers quite literally froze off and I needed to head inside to warm up.

Being our last day and not having to catch a bus meant we could dawdle, and dawdle we did, not getting on our way until after 9am again.
In all our dawdling, we only realised a day or so later that we’d left our cups, bowls and cutlery in the common room, never to be seen again. Luckily today was our last day or we would have been in serious trouble!
But regardless, Day 3 was off to a good start.
The previous night the resident ranger delivered the amazing news that a critical bridge on the final leg had been restored the day before and we could now hike all the way to The Divide instead of taking the Pass Creek Track and finish along Hollyford Road. The whole common room erupted into cheers!
Like the other two days, Day 3 starts with an ascent but fortunately, it is only a short and gradual one. Less than 45 minutes later, we reached the Orchard, a beautiful open grassy area full of ferns and what looked like fruit trees (but are in fact ribbonwood trees).

From there the track weaves in and out of the trees, past clear streams and waterfalls to culminate at Earland Falls (174m). We were incredibly blessed with our weather as a few days earlier it had been too dangerous to trek past Earland Falls and hikers had to take the flood detour track instead.


We spent some time having morning tea and then continued on the rather rocky track. The track steadily leads downhill until you reach Lake Howden.

The hut at Lake Howden is no longer (a catastrophic landslide destroyed it in 2020) but this is still a great spot for lunch and a toilet break. It is also here where the Routeburn Track intersects with the Greenstone-Caples Tracks.

From Lake Howden, there’s a short and sharp uphill section, which I didn’t particularly enjoy after feeling all relaxed after lunch. Not long after is the turnoff to the Key Summit side trip, another worthwhile detour if you’re in the mood.

As you near the end of the Routeburn, the track becomes ever wider, which is highly useful as the oncoming stream of day hikers increases with every step. We probably found this last section (after Key Summit) the least interesting, or perhaps we just didn’t like the hordes of people on the track.
By the time we got to The Divide Shelter, it was getting warmer and warmer and I was definitely suffering from ‘end-of-trail-itis’. We took the obligatory ‘finish photo’ and were happy to locate our campervan in the car park.
SIDE TRIP: KEY SUMMIT (3.4KM ONE-WAY)
The side trip to Key Summit will add about an hour to your hike, and unless you’re pressed for time, I would definitely try and do it (if the weather is clear, that is).

Apart from the expansive views, there’s a boardwalk nature trail taking you through alpine wetlands, past tarns and bogs, and through sub-alpine shrubland.

You can also glimpse Lake Marian in the distance, which is a great half-day walk around the corner from The Divide along Hollyford Road.
FINAL THOUGHTS
Just like the Milford Track, the Routeburn Track is a magnificent Great Walk and unless the weather is absolutely miserable, you’re going to have a glorious time.
Except for the last section on Day 3, we enjoyed every minute on the Routeburn Track.

Normally we can fix upon a favourite day quite quickly but with the Routeburn we still can’t quite decide if Day 1 or Day 2 was our favourite day:
The beech forest, clear streams, cascades, the Routeburn Flats and the majestic views into the Routeburn Valley from above the treeline on Day 1 vs. the stunning Routeburn Falls cascades, the breathtaking sub-alpine cliff bowl leading to Lake Harris, the expansive views over the Hollyford Valley and Darran Mountains, and serene Lake Mackenzie on Day 2.
Tough choice.
If you can get a spot, don’t hesitate. It’s a spectacular hike!
Happy hiking,

MORE POSTS ON MULTI-DAY HIKES IN NEW ZEALAND
- Without a doubt, the iconic Milford Track is New Zealand’s most incredible Great Walk. It’s even harder to get in than the Routeburn but if you do, you won’t regret it. It’s just spectacular.
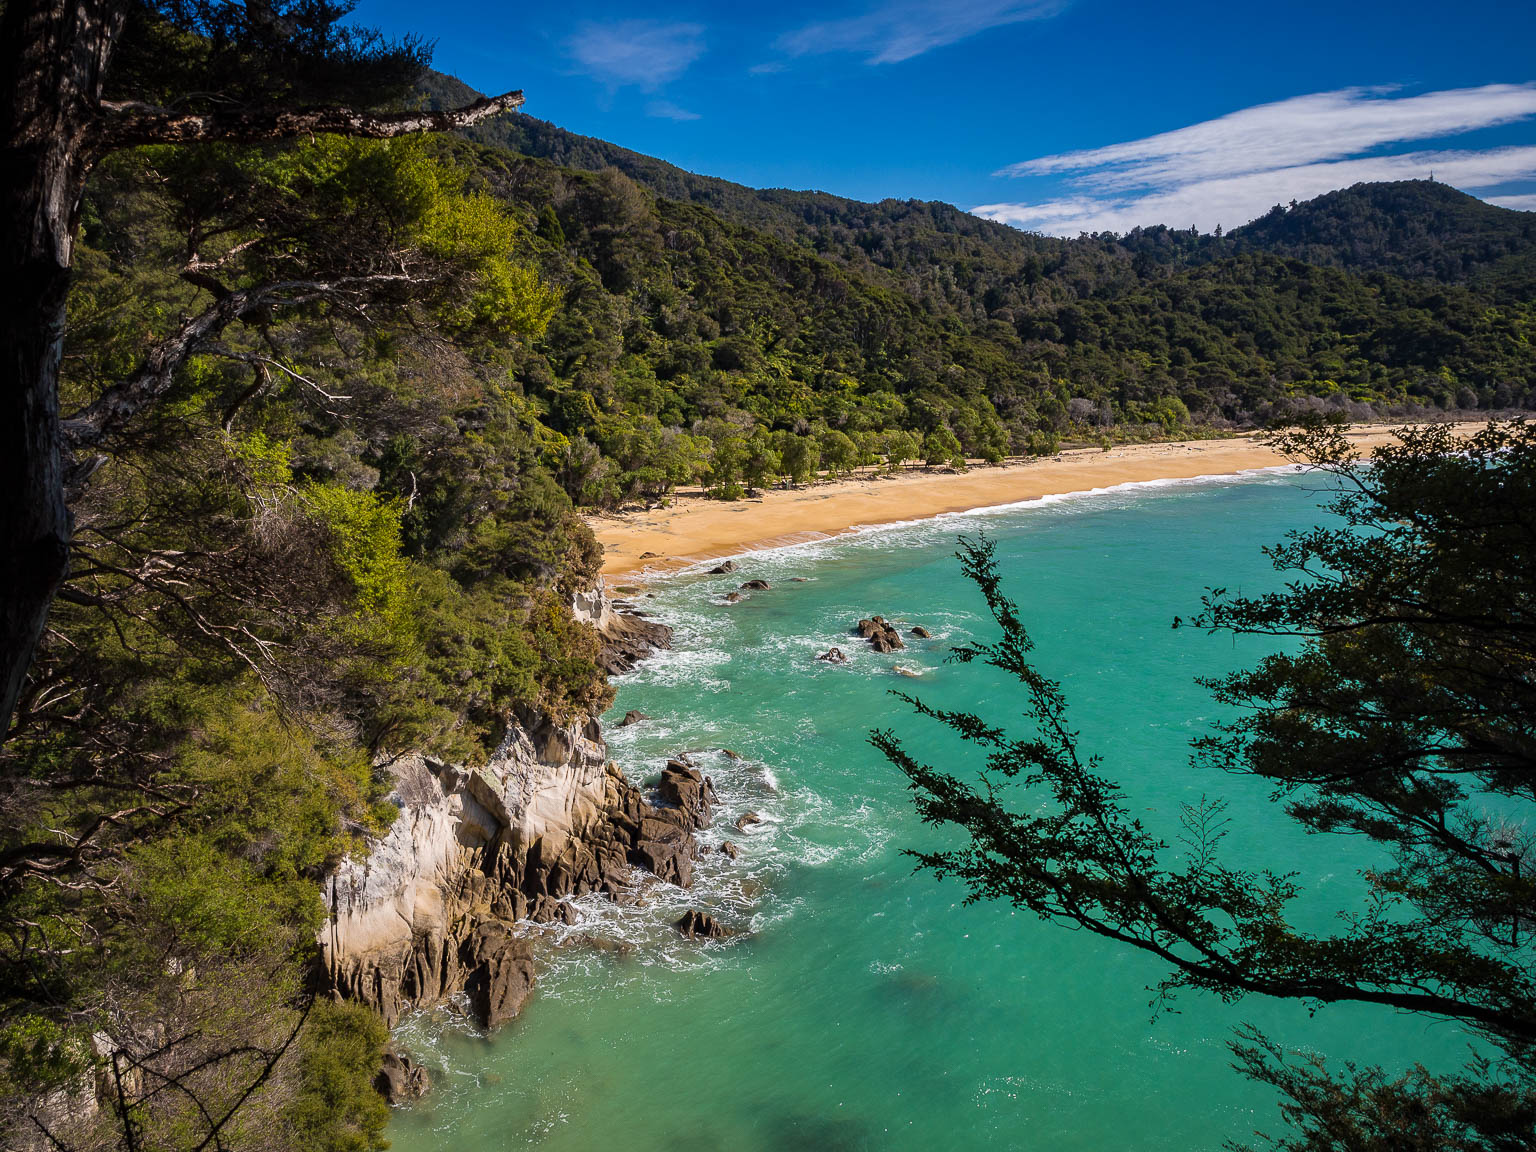
- The Abel Tasman Coast Track is another fantastic Great Walk on the South Island. It’s accessible year-round and much more affordable, especially in the off-season.
- The Queen Charlotte Track is close to the Abel Tasman Coast Track in the Marlborough Sounds region of the South Island. It’s a beautiful coastal track that can be done at any time of the year.
SAVE TO PINTEREST


No Comments