

This post contains affiliate links. If you buy something through these links, I may earn a small commission at no extra cost to you. I only recommend gear I’ve actually used out on the trails and really loved! Read my full disclaimer.
The Kangaroo Island Wilderness Trail is on Kaurna, Narrunga, Ngarrindjeri and Ramindjeri Country. I acknowledge the Traditional Custodians and their deep and ongoing connection to Country. I pay my respects to their Elders past and present.
I’d been semi-eagerly (is that a word?) awaiting to hike the Kangaroo Island Wilderness Trail in Flinders Chase National Park since the horrific bushfires burnt almost the entire national park (97%!) to a crisp in January 2020.
While it took a few years for the fire recovery to do its magic and for the trail infrastructure to be completely rebuilt, the trail finally reopened in December 2023.
I desperately needed a break from work and a good dose of nature, and since the trail fits very neatly into one week, we decided on a spur of the moment to book a short trip to Kangaroo Island to hike the 66km trail.
It ended up being a great choice for a week’s getaway, especially since the new facilities turned out to be some of the best in Australia.

KANGAROO ISLAND WILDERNESS TRAIL: WHAT TO KNOW BEFORE YOU GO
The Kangaroo Island Wilderness Trail At a Glance

The Kangaroo Island Wilderness Trail (KIWT) is not the world’s most amazing hiking trail. It’s not even Australia’s most incredible hiking trail (see where it’s in my ranking of the best multi-day hikes in Australia) but the KIWT is a very enjoyable, scenic coastal walk.
Being a southern coastal hike, we kept comparing it to the Three Capes Track in Tassie, even though they’re quite different trails with vastly different amenities and associated price tags.

From a scenic point of view, I enjoyed the KIWT more than the Three Capes Track while the husband preferred the Tassie hike for its dramatic cliffs.
We never felt completely remote on this hike as there are so many points where you intersect with roads, houses and cabins, day walkers or guided groups. It felt like help was more or less readily available should we need it.
THE ROUTE: A SEMI-STRUCTURED ONE-WAY HIKE
The 66km kilometre trail can only be hiked in one direction—west to east—and usually takes about five days.
Your last day is a very short 7.6km stretch, which could feasibly be squished into the previous day if you don’t mind a longer day, thus making the KIWT a 4-day hike. You’ll just need a car shuffle or a private shuttle back to the start.
Only 12 individual hikers are allowed on the trail each day, and you can only stay at each campsite for one night. There were eight other hikers when we went, which felt fairly full given that most people seemed to be on their own (based on what I gleaned the logbooks).
You may also meet a few guided groups, but most do not actually stay on the trail but get bussed in and out instead. We encountered three different groups over the five days but none stayed in the campgrounds so it still felt fairly quiet and relaxing.
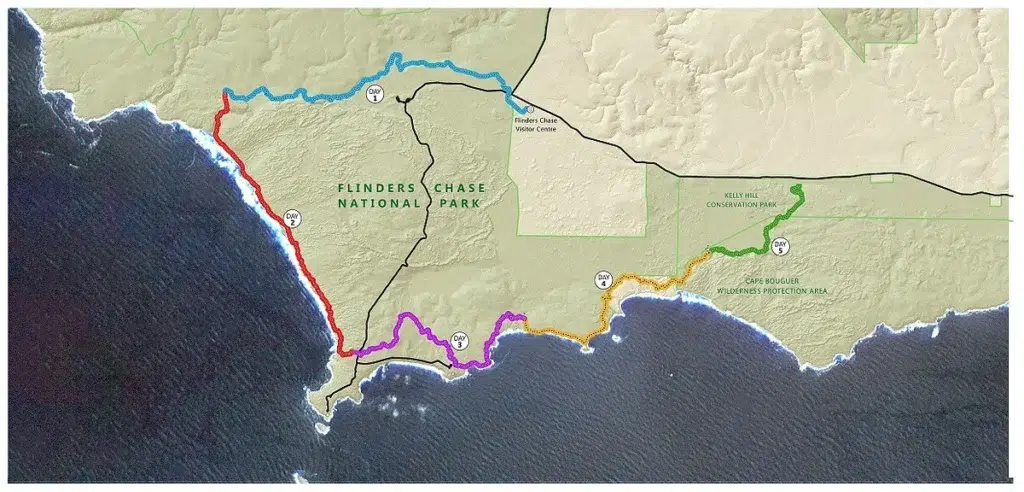
You start at the Flinders Chase Visitor Centre and finish at Kelly Hill Caves. There are a few side trips along the way that you don’t want to miss and which will add a few more kilometres to the overall tally.
We took five days as we didn’t want to rush and hadn’t done a longer hike for a few months. We also wanted to visit Kelly Hill Caves on the last day.
TRACK CONDITIONS, ELEVATION AND TIDES
Being a coastal hike on a relatively flat island, the elevation changes are fairly minimal. If you’re reasonably fit, you’ll barely even notice that you’re going up and down here and there.
What is exhausting on this hike is the constant switch between hiking on sand and rock stepping, especially on Day 2 and Day 3. Because of this, it can be a tiring walk for your feet and ankles, particularly if you’re not 25 anymore.

There’s not a lot of mobile coverage along the trail, your best bets are the higher points. I didn’t mind since I was there to destress and enjoy just being outdoors. We didn’t even take our GPS on this hike because the track is well-marked, though we do always carry our PLB just in case.
TIDES AT MAUPERTUIS BEACH (DAY 2)
Apart from the weather, there’s only one other thing you may need to think about when planning your hike: the tides. They’re only relevant for Day 2 when you need to hike along Maupertuis Beach at low tide. Alternatively, you can take the high-tide track but that is both longer and more arduous.
Day 2 was the hardest, longest and most scenic as far as I was concerned. But all things considered, this is a moderate to easy hike if you’re generally fit (and I’m actually not that fit).
BEST TIME TO HIKE THE KANGAROO ISLAND WILDERNESS TRAIL
You can technically hike the Kangaroo Island Wilderness Trail year-round but summer will be very exposed and can be excruciatingly hot (40°C+). You’d be out in the sun all day, unless of course, South Australia is blessed with a cool summer (it does happen).
Autumn to Spring (March to November) are ideal, with daytime temperatures around 18°C to mid-20°Cs and cool nights (10-12°C). Winter can be quite wet and windy, though manageable if you have layers and don’t mind fresher weather. We hiked in late March and that was perfect—warm, sunny days but not too hot and only a little bit of rain.
PRACTICALITIES FOR HIKING THE KIWT
Here are a few points to help you plan your hike:
GETTING TO AND FROM KANGAROO ISLAND
Organisationally, the hardest part about the KIWT is getting to the track. It’s best done with your own transport as relying on bus services to/from the trail isn’t a feasible option at this point.
- The Ferry/Flight: You’ll either have to book the expensive SeaLink ferry across to Penneshaw on KI or fly directly into Kingscote. The ferry can book out early, and even with a very small car, it still cost us around $500. If you can somehow arrange a shuttle on the island, passenger-only charges for the ferry are much lower.
- Limited Public Transport: Public transport options on the island are very limited and there no public transport or budget shuttles that will take you to the actual trailhead at Flinders Chase National Park. If you’re a group, you may be able to organise a private transfer with Kangaroo Island Transfers.

Coming from interstate without a vehicle, our main concerns were how to get to the trailhead, how to return to where we left the car, and how to get around the island afterwards.
TAKING A RENTAL VEHICLE ON THE SEALINK FERRY
If you decide to rent a car from the mainland, your first snag will be finding a rental company that actually allows their rental vehicles on the ferry. You could hire a car once you’re on the island but that is prohibitively expensive—especially when it’s going to sit in a carpark for five full days!
Your best bet is to compare mainland rental options through a platform like DiscoverCars to find a company that explicitly permits taking their vehicles on the SeaLink ferry.
PERMITS AND FEES
You’ll need to pre-book your hike online to secure a permit before you head off as independent hiker spots are strictly limited to 12 people per day. You will also need to complete the mandatory induction at the Flinders Chase Visitor Centre before setting out.
Here they provide you with a waterproof map and go through a few things. No permits per se are actually handed out anymore. Our induction took around 20 minutes, which totally surprised us as other ‘inductions’ have usually been more of a tick-box exercise. You can also book in for your tour of Kelly Hill Caves then, which you shouldn’t miss, they’re quite cool.
As of 2026, the trail permit is AU$220 for adults. Included in your permit fees are:
- National park entry
- Car parking at the Flinders Chase Visitor Centre
- Campsite fees (4 nights)
- A large waterproof map and information (provided at induction)
- Admission to the Kelly Hill Caves tour on your final day
NATIONAL PARK SHUTTLE SERVICE
National Parks SA offer a shuttle service from the end of the trail (Kelly Hill Caves) back to the start (Flinders Chase Visitor Centre) at 11:30am on your last day. Information on shuttle options can be somewhat limited online but the national park do provide one.
If you leave your own vehicle at the Flinders Chase Visitor Centre, a shuttle will pick you up at Kelly Hill Caves at the end of your hike and transfer you back to the start. Just be aware that this is no longer included in the standard permit fee—you’ll need to pre-book the transfer as an add-on when you book your trail permit. Confirm at your induction that you’ve booked a shuttle service.
ACCOMMODATION BEFORE/AFTER THE HIKE
There are almost no accommodation options in the western part of Kangaroo Island. The only affordable option close to the trail is the nearby Discovery Park, offering campsites and cabins. We stayed in a one-bedroom cabin both before and after the hike, and it was surprisingly comfortable and nice.

You can also stay in heritage accommodation run by National Parks SA (minimum two nights stay), which is in the national park.
OUR TRIP LOGISTICS
To give you an idea of what this looks like in practice, here’s exactly how we structured our week away to make this 5-day hike happen:
- Saturday (Fly & Drive): Flew from the Sunshine Coast directly to Adelaide → Rented a car from East Coast Car Rentals (one of the few affordable rental companies that allows vehicles on the ferry) → Super quick grocery shopping trip along the way → Drove to Cape Jervis (about 2 hours) and caught the 6pm ferry to KI (about 45 min) → Drove straight to the Discovery Park Caravan & Holiday Park on the western side of KI to stay in a cabin for two nights. Arrived about 8:30pm.
- Sunday (Hike Check-In): Headed to the Flinders Chase Visitor Centre to check in for our hike, book our Kelly Hill Caves tour and confirm our shuttle transfer. We spent the rest of the day exploring the national park by car.
- Monday (Day 1): Parked our car in the designated carpark at the visitor centre and officially started hiking around 7:50am.
- Tuesday to Thursday (Day 2–4): Out on the trail having fun.
- Friday (Day 5): Finished the hike at Kelly Hill Caves. The national park shuttle picked up the husband at 11:30am to get our car from the visitor centre. He drove back to Kelly Hill Caves just in time for our 1pm cave tour together before checking back in for the night at the Discovery Park.
- Saturday & Sunday (Heading Home): Visited the sea lion colony at Seal Bay → Caught a late afternoon ferry back to the mainland and drove back to Adelaide → Stayed at the Atura Adelaide Airport Hotel (surprisingly nice!) and flew back home the next morning.
A bit of a whirlwind trip but a really fabulous one at that!

FACILITIES ON THE KIWT
A quick word on the facilities before I get into more details about the trail.
The campgrounds cater both to individual hikers and guided group hikers. As mentioned, only 12 self-guided hikers are allowed on the trail each day, and there are separate campsite sections for the two types of hikers. Shelters and toilets are shared by all.

None of the campgrounds are in scenic locations. They have been chosen for what seems like easy access for servicing and perhaps to keep you out of the wind. You don’t do the KIWT for its grand views from the campsites, that’s for sure.
CAMPSITES
The facilities are absolutely fabulous except for … the gravel-based tent pads. Whoever thought that a rough gravel base suitable for caravans or camper trailers is suitable for hiking tents should be handing out cash to every hiker so we can all buy new tents.

Even with our footprint—and having camped in rather rocky sites on the Larapinta previously—we felt very iffy about camping on these pads. Without a footprint, we would have been very unhappy hikers I suspect.
Fortunately, there are also some tent platforms, which make for a much nicer surface. The problem is that there aren’t enough, and they are usually located in the group tour section rather than the self-guided area.

Since no guided tours were actually staying in the campgrounds during our hike, we all helped ourselves to whatever tent platforms were available. Since there weren’t enough platforms to go around every night, one fellow hiker ended up with a hole in her tent floor from the gravel base. So, absolutely take a tent footprint.
KITCHEN SHELTERS
Other than the tent pads, the facilities on the KIWT truly are fantastic. The kitchen shelters are especially great.

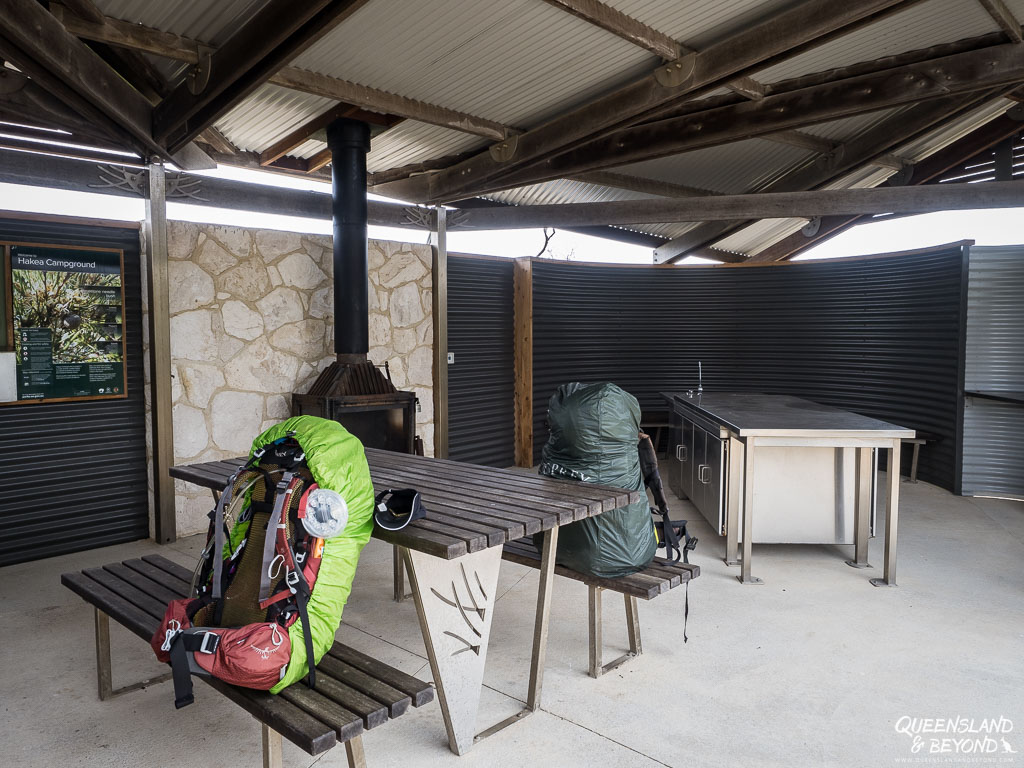
Enclosed on three sides with a roof, they have bench space, a sink with apparently treated water (but with signs to still boil it—huh? we still filtered our water), hooks for gear, tables and benches, a winter fireplace and solar-powered lights. They’ve even added wonderful things like a recess for cooking out of the wind and food storage cupboards.
We used the cupboards every day as neither of us fancied getting our tent ripped apart by a hungry goanna. This also saved us carrying everything back and forth from our campsite to the shelter each morning. Since we tend to leave early and didn’t want to disturb the other hikers, we packed up all our gear at the kitchen shelter. Plus the lights and plenty of bench space made it easy to get organised.
In each campground, the distance between the kitchen shelter and the campsites is at least 50m if not more. Someone really thought about the impact noise from the shelter might have on hikers wanting to sleep!
TOILETS
The drop toilets were very clean and tidy with plenty of toilet paper. Even sanitary bins are provided—never seen that before on a hike.

Just keep in mind that there are no toilets along the track itself, only at the campsites (and at Remarkable Rocks if you take that side trip). Natural cover for bush toileting is mostly non-existent, especially on Day 2, 3 and 4.
WHAT TO PACK: ESSENTIAL GEAR FOR THE KANGAROO ISLAND WILDERNESS TRAIL
While the Kangaroo Island Wilderness Trail is relatively beginner-friendly, the highly exposed coast and rock-hard tent pads mean you do need to think about your gear carefully. Here are a few things I found handy on this track:
KIWT Gear Guide
HIKING THE KANGAROO ISLAND WILDERNESS TRAIL: ITINERARY AND TRIP REPORT
The fire recovery across Flinders Chase National Park is nothing short of incredible. The landscape is green, lush and abundant in flowers, shrubs and with a surprising regrowth of trees.

We loved seeing the national park in such beautiful, vibrant splendour at this point in its recovery.
While there are still signs of charred tree trunks, fallen logs and dead tree tops, in a few more years, these will all be gone, and green (or maybe brown from drought) will have taken over.

When planning, keep in mind that the KIWT is a very exposed track. Apart from the first and last days, there is very little protection from sun, rain or wind.
DAY 1: ROCKY RIVER SECTION | ~18KM (WITH SIDE TRIP: ~22KM)
Day 1 takes you from the Flinders Chase Visitor Centre to Cup Gum Campground, about 18km of walking. The new visitor centre hadn’t been finished when we hiked so we ended up only doing 12km (plus a 4km-return side trip).
Day 1 is probably not the most exciting day on the KIWT but we actually really enjoyed it.
Our morning started with heavy fog, which seemed really odd for mid-March but there it was. We could barely see the road as we drove the few kilometres from our accommodation to the national park.

Fortunately, the fog lifted a couple of hours later but it remained overcast for pretty much the whole day. This suited me fine as it makes easing into a hike more comfortable.
My pack always seems to sit wrong, I often don’t sleep well the night before (mostly nerves), and I’m still carrying all our food (minus dinners, that’s the husband’s job). So for the first few kilometres, I’m often quite uncomfortable and a bit nervy. Hence I’m always grateful when the weather plays along by being cool and not too sunny.
The trail starts at the visitor centre and eventually follows the walking track to the platypus waterholes.
When we hiked, there was no lovely sign (yet) marking the start of the trail, only a makeshift marker that was really a bit sad given how amazing the facilities are on the rest of the trail. We felt like we just walked into some random undergrowth to start our adventure.

Signage was a bit confusing (but has hopefully been fixed now). Our first kilometre marker started at 7km (kilometre markers increase as you walk) when we clearly had only walked two or so kilometres. Once I saw the 8 and 9km markers, I worked out that the first marker was obviously placed in an overly excited attempt to get ready for the longer start of the trail.
In camp that night, it turned out we weren’t the only ones confused by the strange km-markers and a couple of arrows pointing away from the trail rather than to. Use common sense and you’ll be fine.
The start of the KIWT is part of an interpretative walk to the platypus waterholes and you can find some rather cool megafauna cutouts along the track.


From the platypus waterholes (no, we didn’t see any platypus but also didn’t hang around for ages to wait for them), the trail tracks through different types of woodland and vegetation for much of the day.
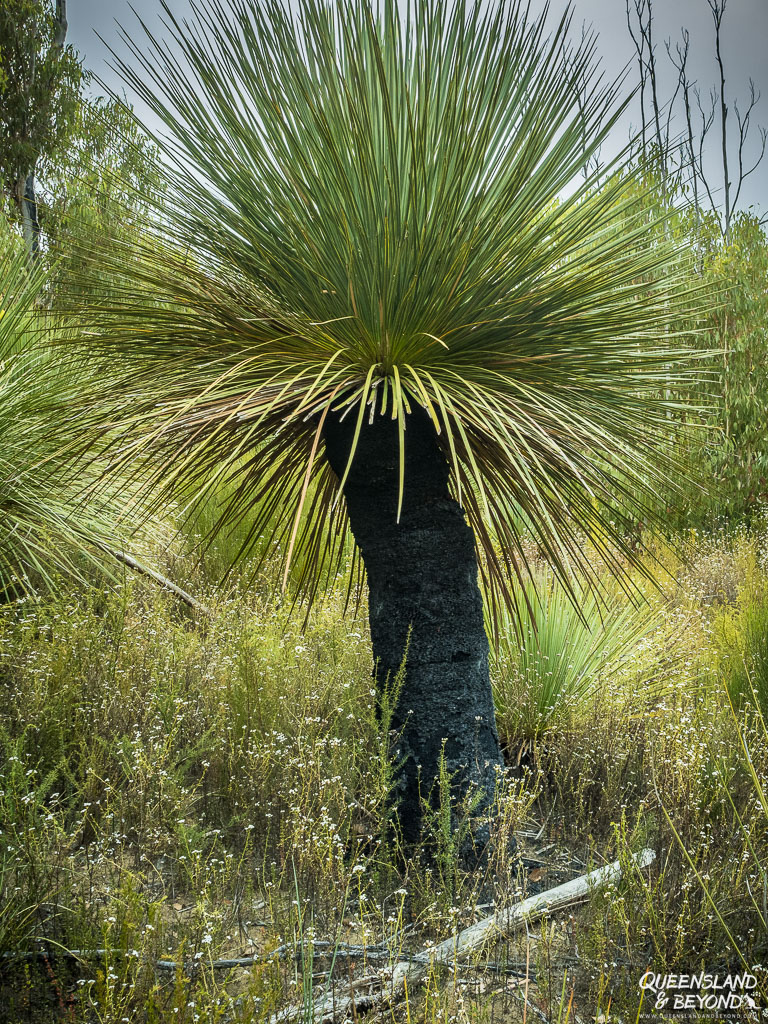
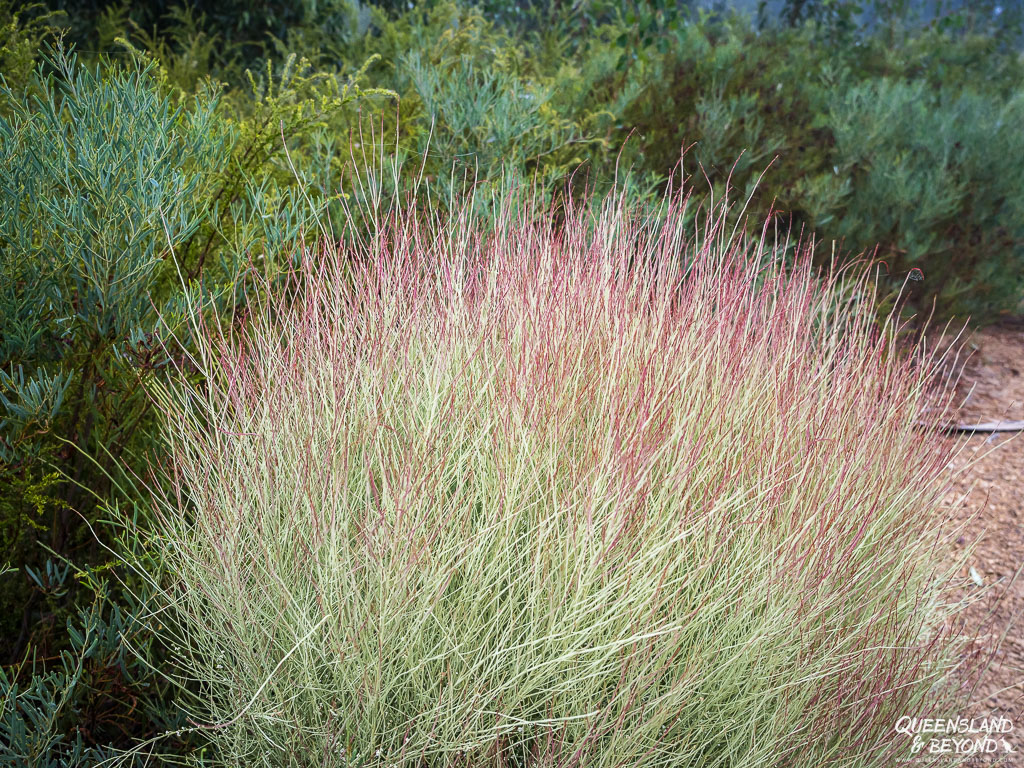
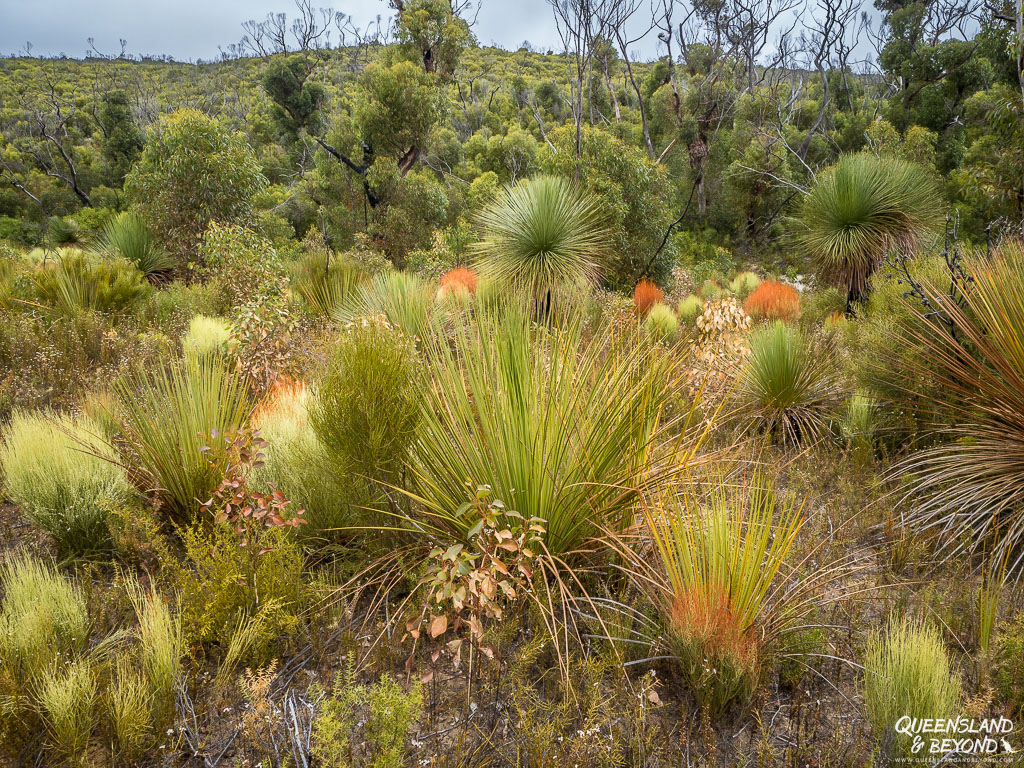
A nice half-way marker is Pardalote Lookout from where you drop into Rocky River Gorge. You then walk through what feels like a wild botanic garden. In March, the greenery was so lush, fluffy and covered with wildflowers, blossoms and new growth, we just marvelled.

You might get a chance to see some platypus at the Cascades. This was a good spot for us to have lunch and meet some day hikers, but surprisingly not for a platypus encounter in the middle of the day.

The rest of the trail is more woodland before ending rather abruptly at Cup Gum campsite.
CUP GUM CAMPGROUND
The first campground was possibly my least favourite but only because the campsites are fairly squished together. There’s an equal number of tent pads and platforms here so everyone ended up on a platform (with people sharing tents).
Still being in the forested part of the trail, there’s plenty of sun protection here but you can also bask in the sun on various benches and wooden sun loungers.


Honestly, the facilities are nuts.
Like with the campgrounds to come, the shelter and toilet are a fair way away from the campsites. You can’t even see the light in the shelter when you’re in the campsite area.
SIDE TRIP: SNAKE LAGOON | 4KM RETURN
If you’ve got the energy, it’s well worth making the effort to trek to Snake Lagoon and the dry mouth of Rocky River. You follow part of this track the next morning but it’s nice to have time to explore the beach in the afternoon.

The ocean is wild here but the beach still looked fairly pristine with its soft white sand framed by limestone cliffs on both sides.

Fortunately for me, no snakes were actually sighted.
DAY 2: MAUPERTUIS SECTION | 14.1KM (NO SIDE TRIPS)
Day 2 is the longest day on the hike, both in terms of distance and hours. It’s a very sand-heavy walking day, taking you from Cup Gum Campground to Banksia Campground, which is close to Cape de Couedic where you find busy Admiral’s Arch.
For us, Day 2 was weird-weather-day.
It started overcast, moved on to clear blue sky, then storm clouds, began raining two minutes later, choked us with wind gusts, and became sunny again. And repeat. Ad nauseam. Rain jacket on, rain jacket off, rain jacket on, … Like that, all day.
But apart from that, Day 2 was actually a pretty nice day.

We left just after sunrise (7:30am) and climbed the only hill there is on the Kangaroo Island Wilderness Trail, a whopping 150m in elevation just past Snake Lagoon.
Once on top of the cliffs, it’s a steady downhill trek to the next campground. This might sound easy enough but exposure, rock and sand make this leg a whole lot harder than it otherwise would be.

After about 3km, you hit Maupertuis Beach and then have to make the choice between the low-tide (beach) or the high-tide track (dunes). Both involve sand walking but the beach is the ‘easier’ option.
Low tide was around 9:30am for us and we hit the beach entrance at 8:45am—perfect timing.


We kept trying to find the hardest bits of sand, which were about a third up the beach and not as close to the water as expected. I wouldn’t want to do this on a hot day when the sand is all warmed up and even fluffier.
I was worried that we might miss the exit from the beach but you get to the end and you can’t go any further. There are some wooden rungs placed to help you climb back up into the dunes.

It’s about a one-kilometre stretch of beach walking and even in the early morning, the sand was so incredibly soft that we felt like we were moving at turtle speed.
From there the trail switches back and forth between sand and rock, and can be much harder on your feet and ankles than you might think. We also ‘lost’ the trail a few times as there are few markers and the rocks all look the same.
Coastal vegetation tends to be fragile and the soft regrowth is still in its infancy so we didn’t want to needlessly disturb the vegetation by not sticking to the trail. But it seemed a bit impossible given the lack of markers in some rocky sections.

That aside, the sprawling views along the coastline are fantastic, the coastal ‘botanic gardens’ are stunning, and the wind-whipped waves constantly give you something to look at.


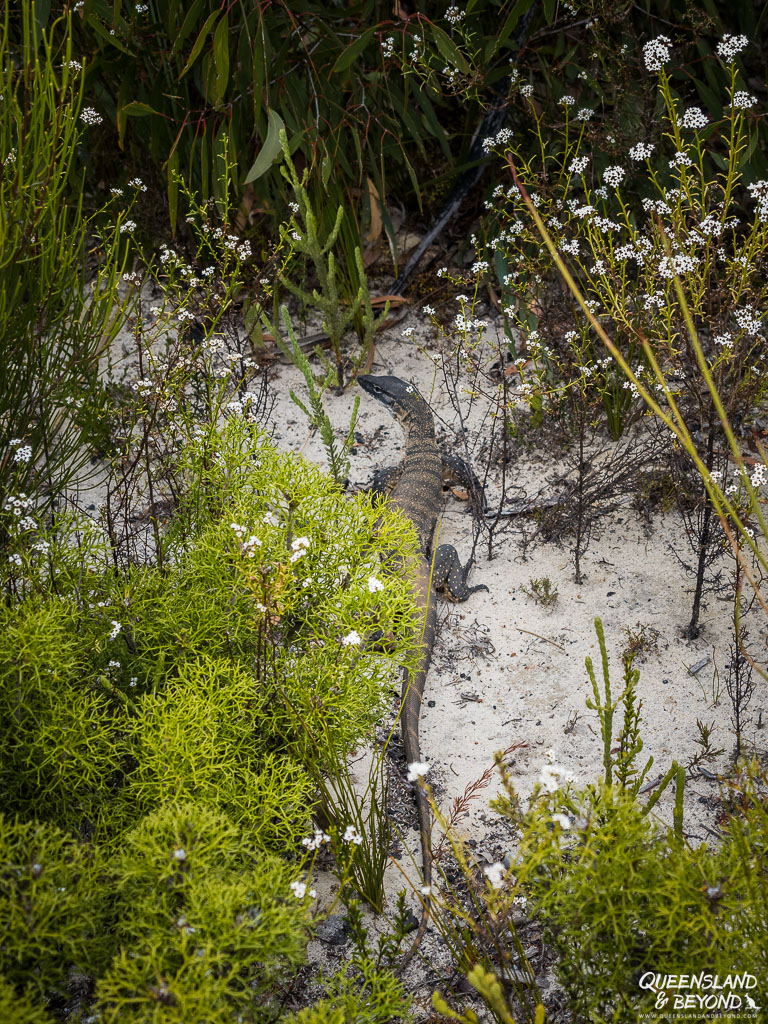
Just before getting to Hakea Campsite, I came across a tiger snake on the track. Happily, she was keen to disappear quickly and remained the only snake sighting for us on this hike.
HAKEA CAMPGROUND
While the campsites at Cup Gum Campground are really squished together, at Hakea they are nicely spaced out.
Weirdly enough, tent platforms have only been built in the tour group section, the individual hikers’ section only offers the awful tent pads.
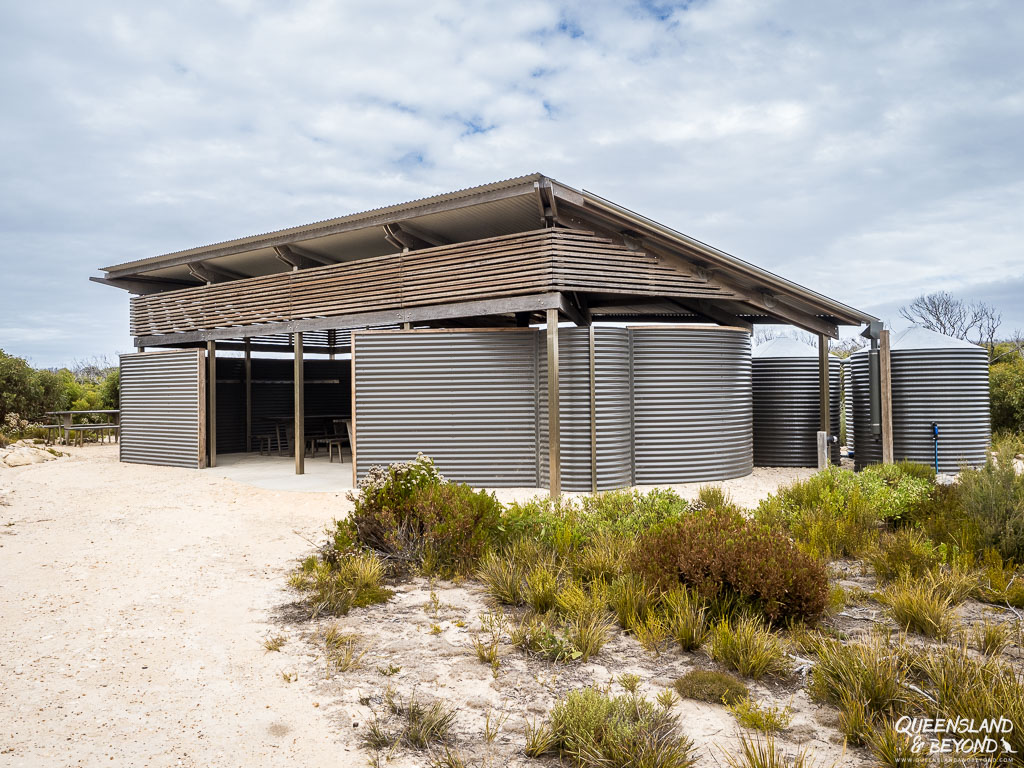
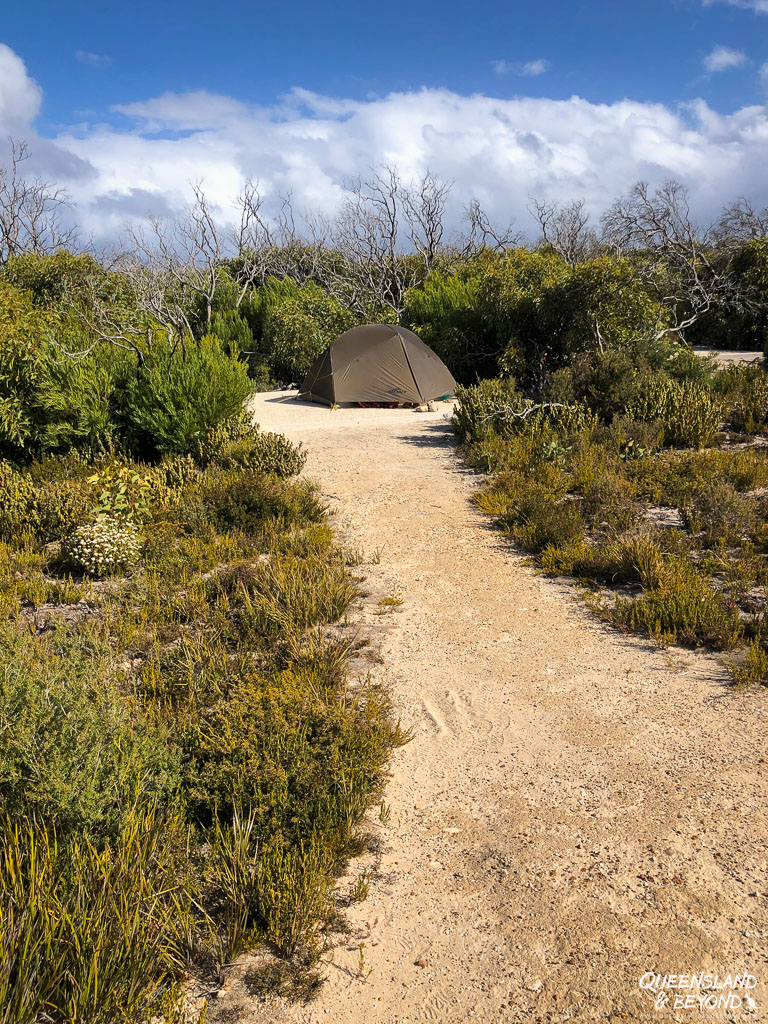
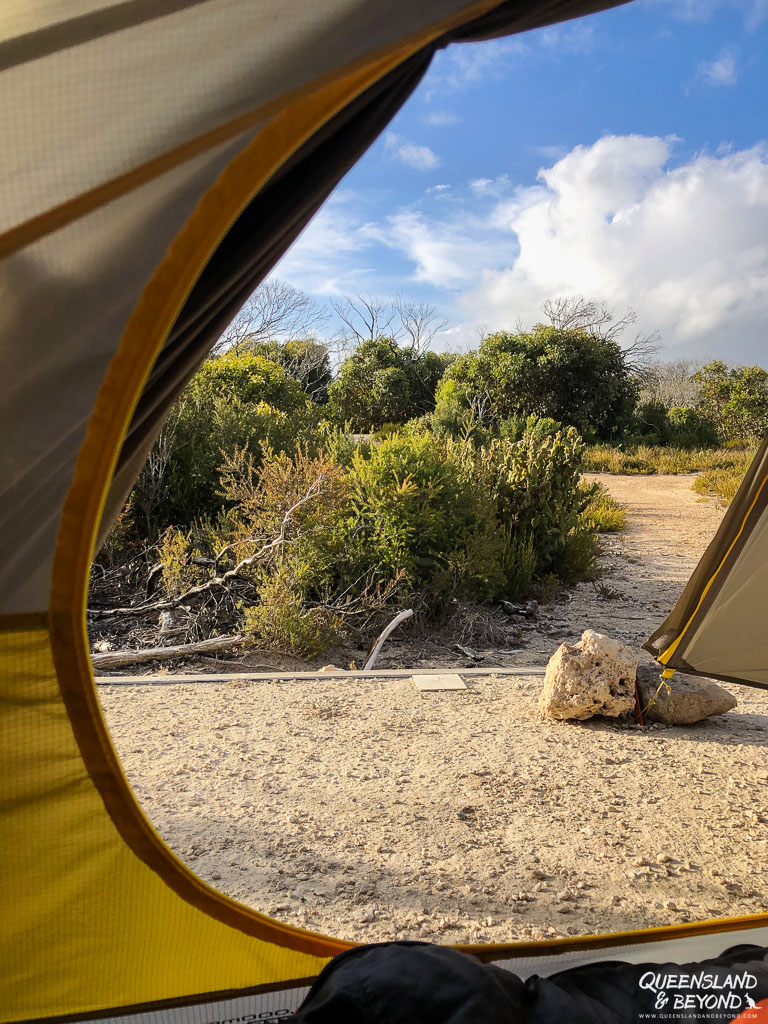
I thought the walk from our campsite to the kitchen shelter was far at Cup Gum. But at Hakea it seemed even further. Which is kind of good if there are some noisy people hanging out at the shelter and you want peace and quiet in your campsite, you probably won’t hear them.
I quite liked Hakea Campground. It seemed nice and open, but I can also imagine it might be fairly hot on a warm summer day given the lack of trees.
SIDE TRIP: CAPE DE COUEDIC (ADMIRALS ARCH) | ~4-5KM RETURN
We didn’t do this but you could hike to Cape de Couedic or Weir’s Cove in the afternoon.
It’s around 4-5km return, and after a tiring day it didn’t seem like the most exciting thing to do when Admirals Arch tends to be busy with tourists. The walking track to Cape de Couedic has been rebuilt and if you’ve got the energy, it might quite a nice walk down.
If you have your own transport, you can also easily visit these sights by car, either before or after your hike—that’s what we did.

DAY 3: SANDERSON SECTION | 13KM (WITH SIDE TRIPS: ~15KM)
We got off before sunrise again so we could get to Remarkable Rocks reasonably early. The first half of Day 3, however, is rather boring.

Leaving Banksia Campground, you traipse through the Yacca Flats but without being able to see any good strands of yaccas. The regrowth has been so prolific that you’re hemmed in on all sides.

Because there’s so little to see, the hiking tends to be fairly fast and you’ll be at the turnoff to Remarkable Rocks in no time. It took us less than 1.5 hours for that first 7km section to the turnoff.
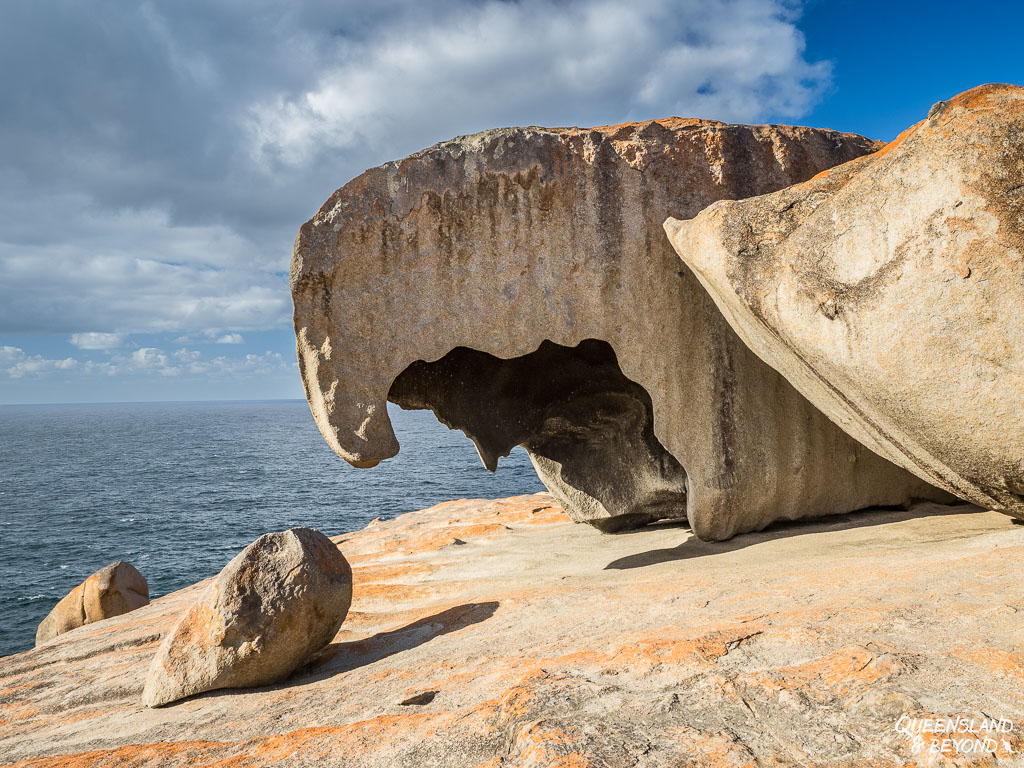
From there it’s only about a kilometre to the actual rocks (including the boardwalk section). Unless you’ve seen Remarkable Rocks before, it’s definitely worth the tiny detour. We dumped our packs in some undergrowth before turning off the main trail and got to the start of the boardwalk section in about five minutes.

Though I was initially a bit underwhelmed, we then proceeded to spend a good hour at the rocks, crawling around them from all angles. Luckily for us, we had them completely to ourselves until just before 10am when we were ready to leave anyway.
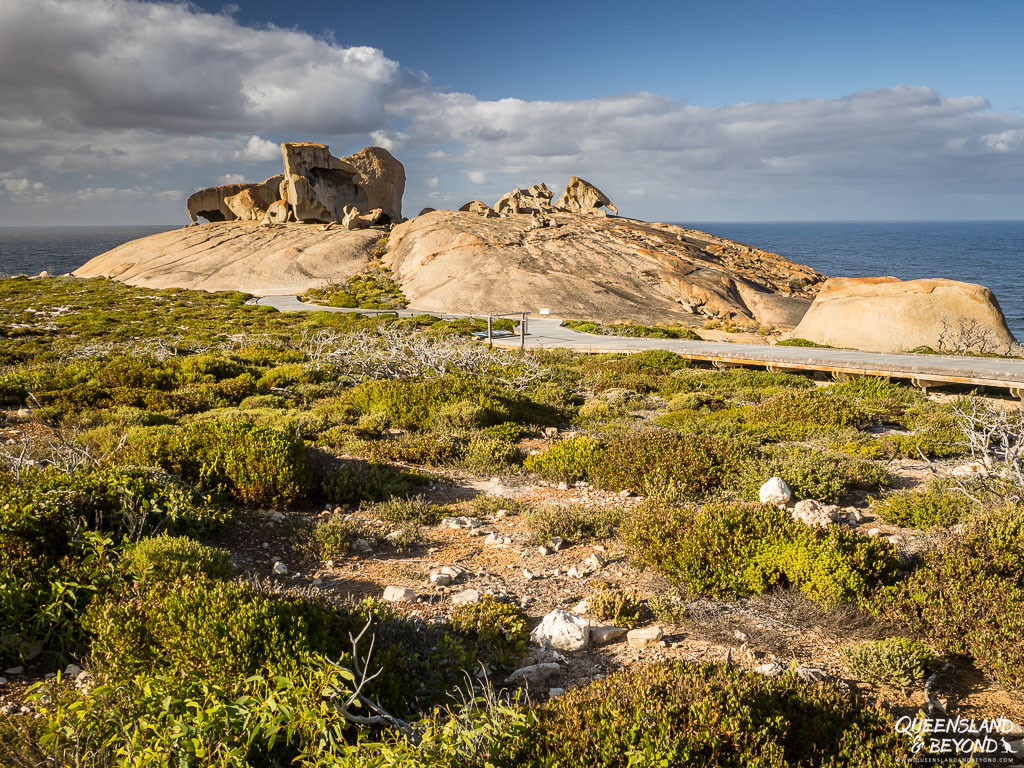

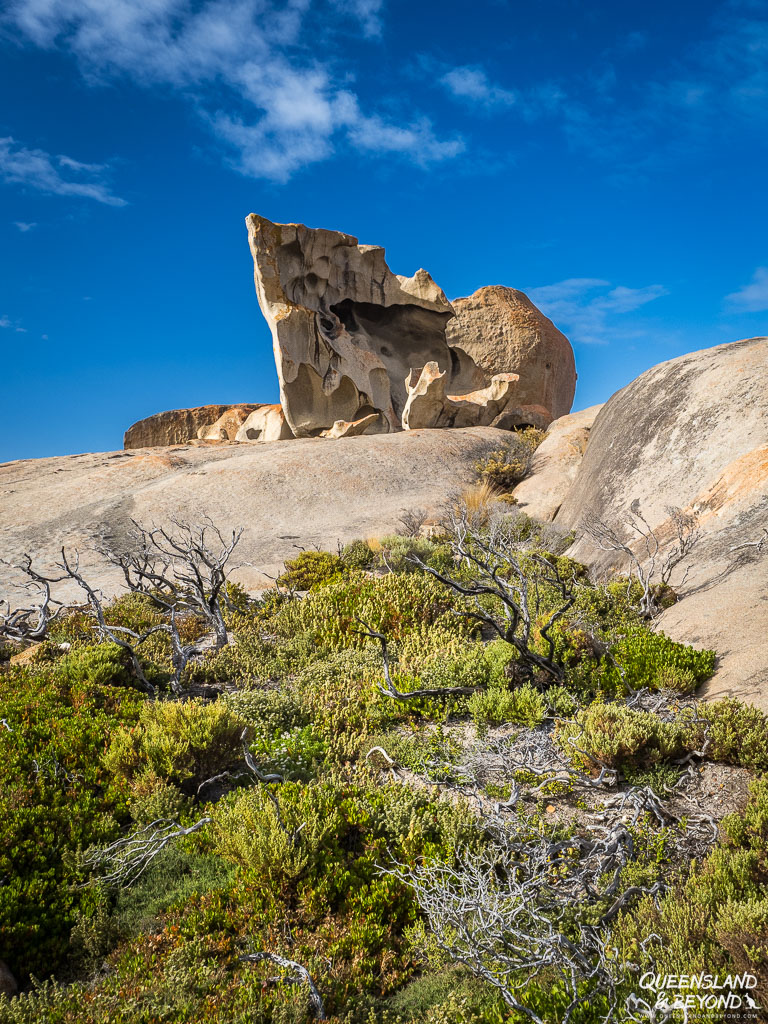
Back on the trail, it was another 7km to the campsite for the night. Fortunately we were now on top of the cliffs again and could entertain ourselves with spotting seal pups frolicking in the waters below.

Just before you reach Banksia Campground for the night, you can take a side trip to Sanderson Bay Beach.
It’s only about 1km return but we headed to camp first where we had lunch, set up the tent and sorted out our stuff. Later in the afternoon, we went back to the turnoff, which was only about 1km back from the campground anyway.
BANKSIA CAMPGROUND
If the campsites at Hakea are spread out, Banksia Campground offers even more space.

Randomly, the number of tent platforms decreases with each campground so there are only 4 or 5 platforms at Banksia. Half of these are in the tour group section.
The rest of the facilities are pretty much identical, except for the odd viewing platform right next to the kitchen shelter.

It seemed so random yet I loved sitting up there and enjoying the view over the grassland vegetation. There isn’t really a view of anything other than sprawling greenery but you do get 360° views of it!

SIDE TRIPS: REMARKABLE ROCKS & SANDERSON BAY BEACH | ~1KM + 1KM RETURN
Of the two side trips for the day, Remarkable Rocks is a must-do while Sanderson Bay Beach definitely isn’t.
Both are short side trips but Remarkable Rocks will consume much more of your time than the beach will.

Sanderson Bay Beach isn’t the prettiest beach on the island. There’s a lot of flotsam and jetsam that gets washed up here and it’s just a really wild beach without having the natural beauty of Snake Lagoon.

But there are some very cool tidal pools (sharp edges!) that we spent some time exploring.


Remarkable Rocks are one of the main sights Kangaroo Island is famous for, and while I was initially a bit disappointed, they grew on me. I think I just expected them to be more magnificent.
The way these rocks are balanced on their granite base is pretty cool. Don’t miss them.
DAY 4: GRASSDALE SECTION | 13.3KM (WITH SIDE TRIPS: ~17.3KM)
You start moving away from the coastline on Day 4 as you head from Banksia Campground to your last site, Tea Tree Campground.
Despite the cold morning (about 8-9°C), we headed off before sunrise. Given the blue sky, I enjoyed the cliffs being basked in golden hues from the early morning light. Honestly, it’s my favourite time of the day, everything still seems fresh, clean and full of God’s grace.

We continued traipsing above the cliffs and it didn’t seem to take much time at all to hit Cape Younghusband.

From there it’s off into the shrubs again but not before winding around some coves and getting to watch more seal pups enjoying themselves in the waves. Seal pups are just hilarious.
As the trail approaches the back of the pricey Southern Ocean Lodge, you leave national park territory and hike on private land for a few kilometres.

The trail keeps going through not-so-interesting vegetation until you reach the turnoff to Hanson Bay Beach. Here you are met with arguably the best part of the KIWT: The punt boat ride across the South–West River.

You use the rope to pull yourself across the river; or in my case, you just enjoy the ride. It is so much fun! 🙂 Every single hiker thought it was hilarious and wonderful.
Once across the river, you can either take the side trip to Hanson Bay Beach—gorgeous—or move onto Tea Tree Campground after another three or so kilometres. I suggest you go to Hanson Bay Beach first because the last three kilometres are really boring and will feel very hot as they’re super exposed.
TEA TREE CAMPGROUND
The walk into Tea Tree Campground is much longer than at any of the other campgrounds. You arrive at the sign fairly quickly after the turnoff to the campground but then keep walking and walking and walking.
We actually backtracked a couple of times because we thought we’d missed another marker somewhere and were supposed to turn off.

Follow the track, it’s just much further from the sign to the actual campground than for any of the other campgrounds where it’s pretty much a matter of: “Sign. Voilà. Campground.” At Tea Tree, it’s: “Sign. Walk, walk, walk. Walk some more. Campground.”
Tea Tree Campground also has a bridge leading from the kitchen shelter and toilets to the campsites. Kind of cool. Just don’t fall in the river if you go to the toilet at night.
There are only four tent platforms here, two in each section.


Tea Tree Campground also has a communal fire place inviting hikers to share and reflect on the trail. I haven’t quite made up my mind yet as to what I think of this. Might be quite nice for groups?

With us hiking in early autumn, there was no firewood provided and very little need for a fire anyway. Temperatures were well into the mid-20s during the day (though quite chilly at night already).
SIDE TRIPS: HANSON BAY BEACH & EDWARD’S COTTAGE | ~1.4KM + ~2.6KM RETURN
The last full day offers up two side trips and both are worth it in my opinion.
First of all, don’t miss Hanson Bay Beach. Even if you don’t want to go for a swim—I didn’t but it is a swimming beach—it is just stunning. Kangaroo Island really has some beautiful, beautiful beaches, and this is one of them.

It is a three-kilometre boring walk back to the turnoff so it’s best to do it when you initially come past. Unless it’s a really hot day and you want to hang out at the beach for the afternoon anyway.
If you’re historically inclined, go and take a peek at Edward’s Cottage, an old limestone cottage. There’s no sign to it, just follow the road out of the campground past the toilets and you’ll see it in the far distance.
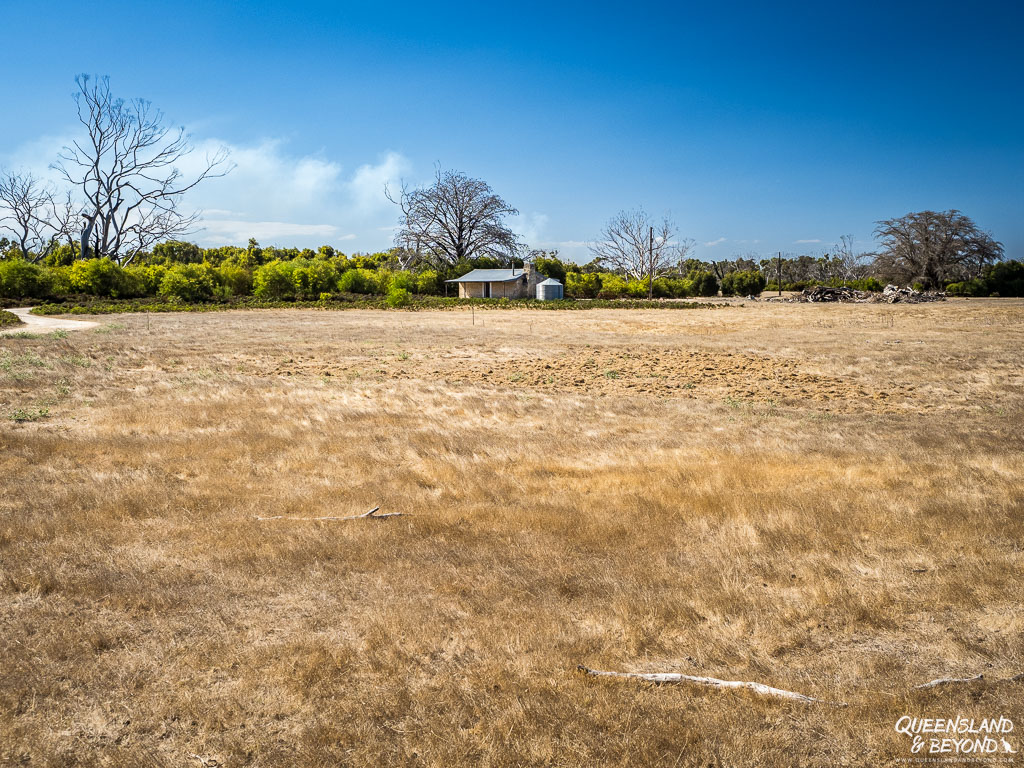
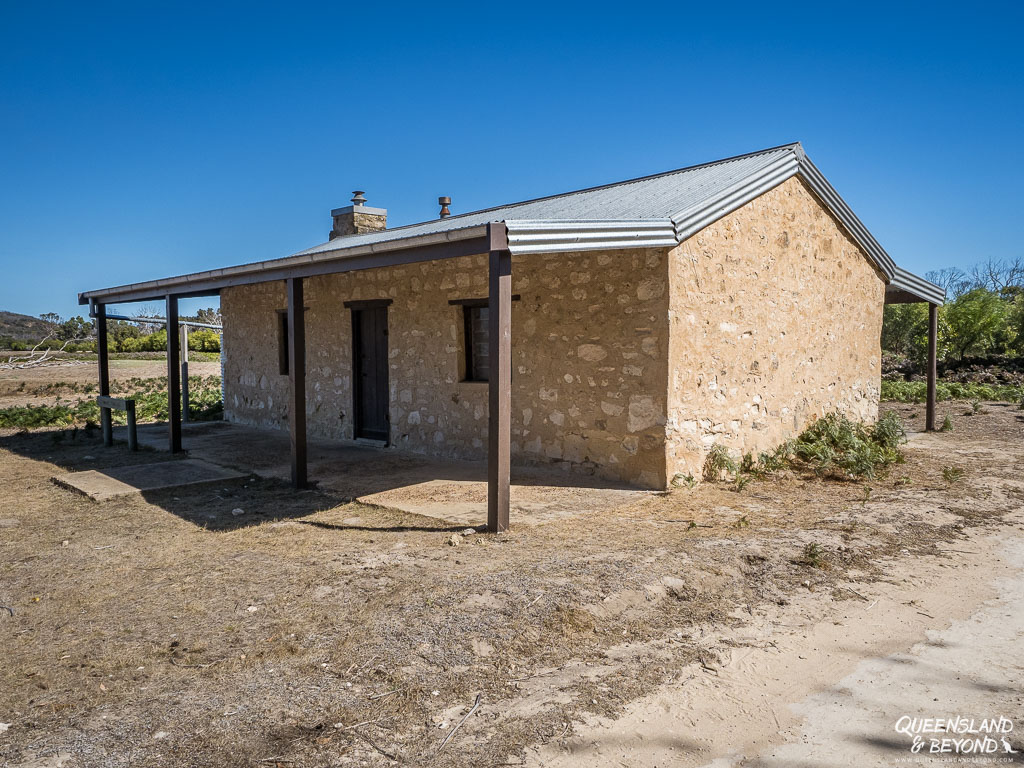
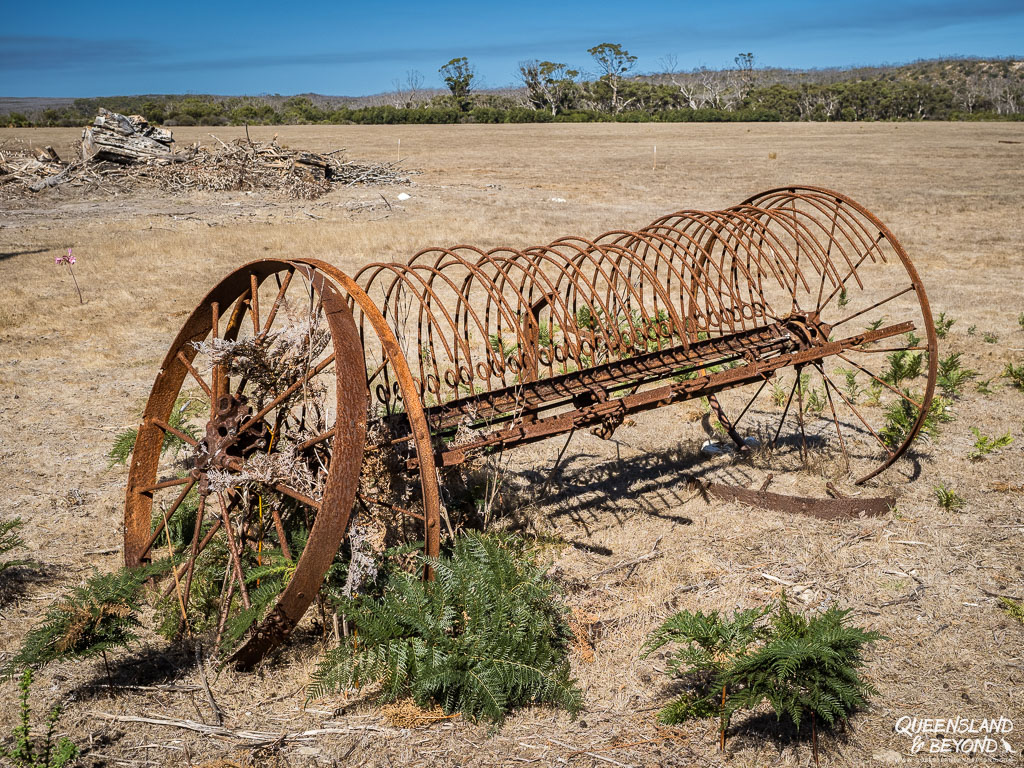
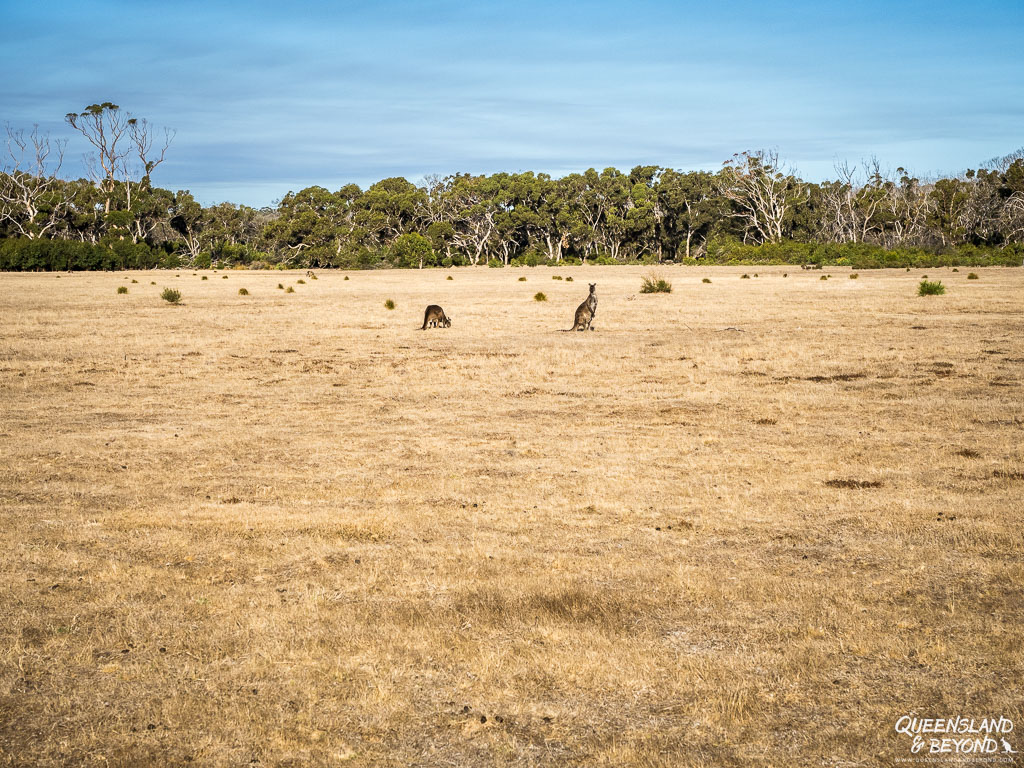
It’s probably a 15-20 minute walk (= meander) each way. There’s also a good chance you’ll come across kangaroos in the open field along the way.
DAY 5: KELLY HILL SECTION | 7.6KM (NO SIDE TRIPS)
The last day isn’t much to shout about. You basically just leave Tea Tree Campground and end up at Kelly Hill Caves in next to no time.
There are some interesting bits vegetation-wise and you can glimpse Grassdale Lagoon from above (until the regrowth puts an end to that).

Depending on the time of year you do the Kangaroo Island Wilderness Trail, you might have a fabulous time observing birds at the lagoon. We didn’t have much luck beyond a couple of black swans.
Some other hikers watched parrots for a while and that would have been fun but we weren’t so lucky.
We weren’t in a hurry to leave and probably left camp around 7:45am (for once, we weren’t the first to leave). We initially walked relatively fast since it was an icy morning (3°C at 6am) but then we totally meandered and reached the end around 10am.

Arriving so early meant we had plenty of time for a cup of tea and a snack before our transfer at 11:30am.
Then it was off to Kelly Hill Caves for our 1pm tour, and a well-deserved coffee (ah, tea), cake and shower (in that order) back at the Discovery Park.
A THOROUGHLY ENJOYABLE HIKE
Despite not wowing us at every corner, the Kangaroo Island Wilderness Trail is definitely worth doing. We have no regrets about our trip and would do it again (if it wasn’t so hard to get to KI). It was a really great way to see a bit of Kangaroo Island and restore some much needed balance to my mind and body.
The regrowth is amazing, and we truly loved the natural botanic gardens we felt we were walking through for much of the first two days.


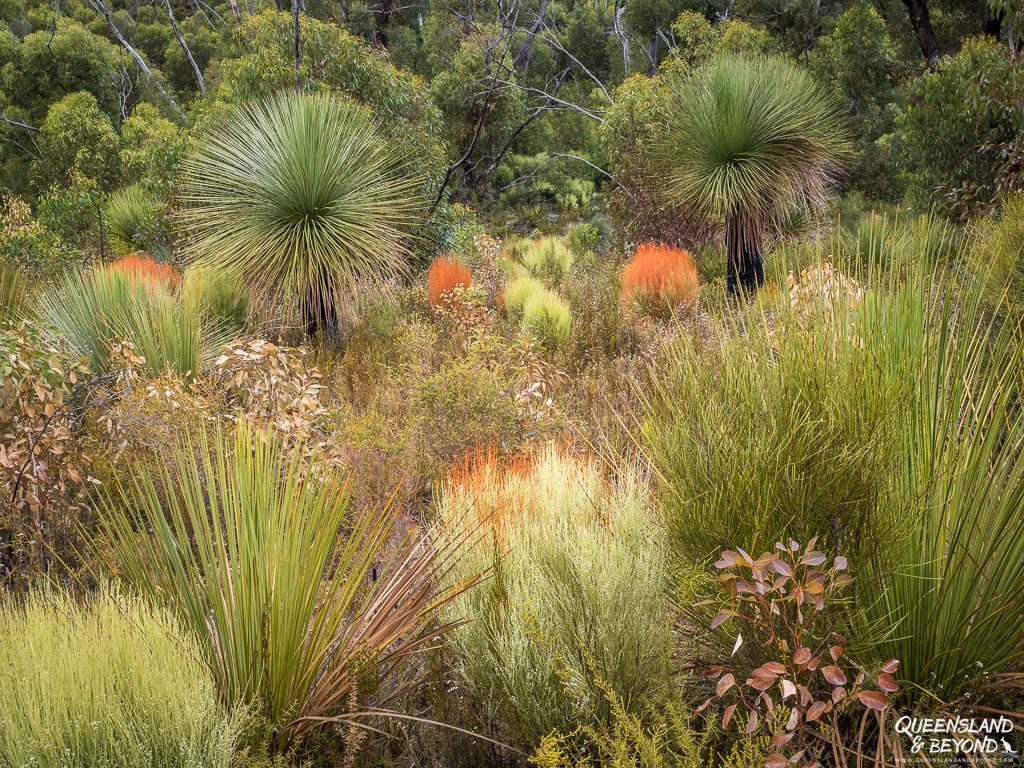
Since you’re walking mostly on sand and rocks, the walking can be a bit hard on your feet and ankles. My feet definitely felt tired at the end of each day.
I didn’t get to any great photo spots for sunrise or sunset but that wasn’t my goal on this hike anyway. I wish I’d got up a bit earlier a couple of times and actually made it onto the cliffs before sunrise but the sunrises were pretty much fizzlers so I wasn’t too upset.

The hardest part of the hike is probably getting there, the rest will feel like a piece of cake if you’re fit. Unless you’re hiking in the heat, then this could turn into a pretty tough walk.
If you haven’t done much multi-day hiking or aren’t used to camping when hiking, this trail would be a great option, especially if you’re going with more experienced hikers.
Happy hiking,

Planning more multi-day hikes? For one of the best hiking experiences in Australia, the 230km Larapinta Trail can’t be beat. It’s the one we’d definitely do again.
If you want to know what other trails we rank highly in Australia, check out these exceptional multi-day hikes in Australia.
PIN FOR LATER



No Comments